Exposure Compensation (for automated exposure modes)
http://www.digicamhelp.com/camera-features/advanced-settings/ec/
http://www.cs.mtu.edu/~shene/DigiCam/User-Guide/995/EXPOSURE/EV-compensation.html
http://www.shortcourses.com/use/using3-4.html
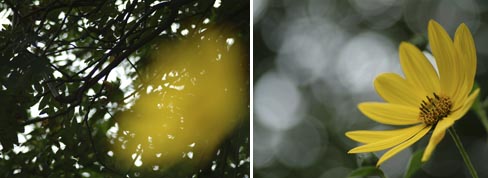
 Since a typical scene averages out to be about 18 percent gray,
that's what the auto exposure system in camera tries to
do--expose every image as if it averaged out to be 18 percent
gray. That's a problem for images we want to be lighter (snow)
or darker (black cats). Cameras allow the user to conveniently
adjust the exposure to over or under expose in increments of
1/3 stop up to plus or minus who stops.
-2 -1 0 +1 +2 Over exposing by +1 stop might be just right
|..|..|..|..| photographing a bright scene as the one above.
^
The snow scene above is typical of scenes that are lighter than
18 percent gray. Most of the important tones in the scene are
at the lighter end of the gray scale. The overall "average"
tone would be about one stop brighter than middle gray. For a
good picture you have to increase the exposure by one stop (+1)
to lighten it. If you didn't do this, the snow in the scene
would appear too gray (bottom).
Using the Focus/Exposure Lock
http://www.digicamhelp.com/basic-techniques/fe-lock/
http://www.digicamhelp.com/taking-photos/basic-techniques/autofocus-problems-and-solutions/
http://www.digicamhelp.com/camera-features/shooting-modes/face-detection/
http://www.digicamhelp.com/camera-features/camera-modes/focus-modes/
Many digital cameras are set to default to focus continually
or have another focus mode that causes the camera to
automatically select the main area that will be focused in a
scene. These modes can be unreliable, resulting in poorly
focused, soft looking images.
For optimal results for the vast majority of scenes, switch
to a single or center area focus mode and lock focus where
you want it. Also make sure to set the diopter setting so
that lines, boxes and information in the viewfinder is sharp.
When pressing the shutter button half way, the camera comes
alive--determining where to focus and determining what
combinations shutter speed, aperture and sometimes ISO
setting to give a proper exposure.
Many times you want to focus on a subject that not in the
center of the image.
Since a typical scene averages out to be about 18 percent gray,
that's what the auto exposure system in camera tries to
do--expose every image as if it averaged out to be 18 percent
gray. That's a problem for images we want to be lighter (snow)
or darker (black cats). Cameras allow the user to conveniently
adjust the exposure to over or under expose in increments of
1/3 stop up to plus or minus who stops.
-2 -1 0 +1 +2 Over exposing by +1 stop might be just right
|..|..|..|..| photographing a bright scene as the one above.
^
The snow scene above is typical of scenes that are lighter than
18 percent gray. Most of the important tones in the scene are
at the lighter end of the gray scale. The overall "average"
tone would be about one stop brighter than middle gray. For a
good picture you have to increase the exposure by one stop (+1)
to lighten it. If you didn't do this, the snow in the scene
would appear too gray (bottom).
Using the Focus/Exposure Lock
http://www.digicamhelp.com/basic-techniques/fe-lock/
http://www.digicamhelp.com/taking-photos/basic-techniques/autofocus-problems-and-solutions/
http://www.digicamhelp.com/camera-features/shooting-modes/face-detection/
http://www.digicamhelp.com/camera-features/camera-modes/focus-modes/
Many digital cameras are set to default to focus continually
or have another focus mode that causes the camera to
automatically select the main area that will be focused in a
scene. These modes can be unreliable, resulting in poorly
focused, soft looking images.
For optimal results for the vast majority of scenes, switch
to a single or center area focus mode and lock focus where
you want it. Also make sure to set the diopter setting so
that lines, boxes and information in the viewfinder is sharp.
When pressing the shutter button half way, the camera comes
alive--determining where to focus and determining what
combinations shutter speed, aperture and sometimes ISO
setting to give a proper exposure.
Many times you want to focus on a subject that not in the
center of the image.
 When the subject you want to expose (or focus) correctly is
off-center, you can lock exposure (and focus) by pressing the
shutter button halfway down and then, without releasing the
shutter button, recompose the image.
How to Use the iPhone Camera
http://ipod.about.com/od/introductiontotheiphone/qt/Using-The-Iphone-Camera.htm
http://osxdaily.com/2014/05/21/iphone-camera-tips-better-photos/
HDR Shooting with dSLR Camera - Requirements
Mount Camera on a Tripod
Set Camera to Exposure Bracketing
Shutter Release or Timed Shutter Release
Software such as Photomatrix Pro http://www.hdrsoft.com
Time Lapse Photography vs Video
http://digital-photography-school.com/timelapse-photography-tutorial-an-overview-of-shooting-processing-and-rending-timelapse-movies
http://watch.opb.org/video/2288686259/
Award-winning photographer Ben Canales takes us on a
photo-safari to Olympic National Park to track down the
swirling stars and boiling clouds that populate his amazing
time-lapse videos.
sam.wormley@gmail.com
When the subject you want to expose (or focus) correctly is
off-center, you can lock exposure (and focus) by pressing the
shutter button halfway down and then, without releasing the
shutter button, recompose the image.
How to Use the iPhone Camera
http://ipod.about.com/od/introductiontotheiphone/qt/Using-The-Iphone-Camera.htm
http://osxdaily.com/2014/05/21/iphone-camera-tips-better-photos/
HDR Shooting with dSLR Camera - Requirements
Mount Camera on a Tripod
Set Camera to Exposure Bracketing
Shutter Release or Timed Shutter Release
Software such as Photomatrix Pro http://www.hdrsoft.com
Time Lapse Photography vs Video
http://digital-photography-school.com/timelapse-photography-tutorial-an-overview-of-shooting-processing-and-rending-timelapse-movies
http://watch.opb.org/video/2288686259/
Award-winning photographer Ben Canales takes us on a
photo-safari to Olympic National Park to track down the
swirling stars and boiling clouds that populate his amazing
time-lapse videos.
sam.wormley@gmail.com
